 |
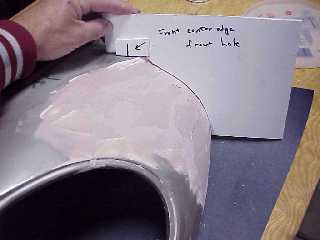
I made new patterns, copied from the
right side, to check build level of the body putty. Each pattern must have locating marks, and position points measured, to duplicate right and left shape. Note the wider areas of putty, in areas that had cracks. These cracks were "V’ed" out (using a round ball bit, on a Moto-Tool) to get sufficient bond. This method prevents putty popping loose due to insufficient contact area. |
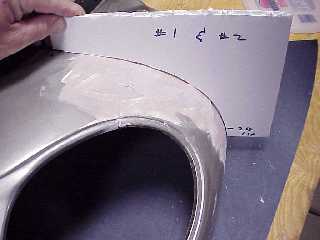 |
Here’s another pattern, copied from
the right side. This one works for two areas, depending
on how the marks are positioned. Use a Sure-Form file, before the putty is completely hard, to rough in the shape. Try to get an area "at height" to served as guide for additional applications of putty. |
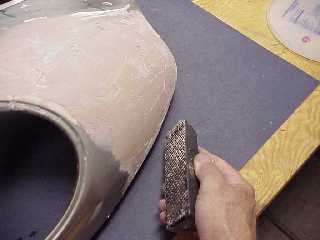 |
A "Sure Form" file works best for removing high spots, while the putty is still semi-flexible. When the putty can be peeled off your mixing plate, it’s ready to be worked with this file. |
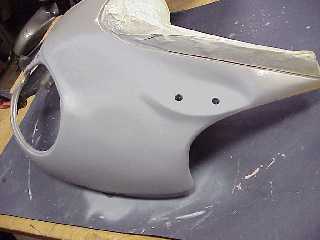 |
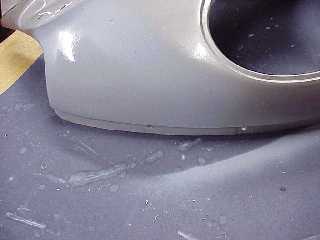
After rough sanding with 120 grit wet-or-dry
(wet sand), I applied several coats of Spot Filler Primer. This paint fills the porosity in the body putty, and is easily sanded. The repair is now fully faired, and fits the side panel perfectly. |
 |
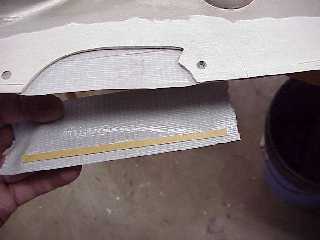
Here is the repair, spot fill primed, on
the right side of the upper fairing. This area was much
easier to repair, using multiple layers of duct tape to
"form" the outside shape. The next photo shows
how. I used fiberglass cloth with epoxy resin, cutting small sections of 1" fiberglass tape to build the lower flange. |
 |
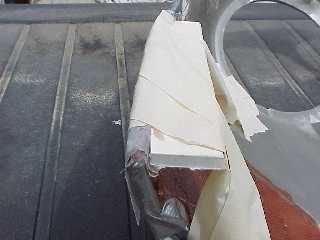
To repair smaller areas, place waxed
paper over the outside surface, slightly larger than the
hole. Tape the waxed paper in place with duct tape. Use small wooden sticks or cardboard to put the right curve into your mold. I’ll use a piece of 1/4 " foam board, against the waxed paper, to mold the flange. Lay up the inside with fiberglass cloth and epoxy. |
 |
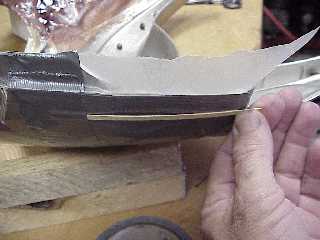
After laying up the fiberglass, I folded
more waxed paper over the flange area. Use a piece of foam board, shaped to match the curve, taped against the waxed paper. This holds the flange area in correct position, during cure. Here is the piece of foam board used to make the flange offset. The end is covered with duct tape, holding it in position. |
 |
One fairing side panel had a piece
broken out of the upper edge. Using many layers of duct
tape for support, I molded fiberglass into this area. Use wooden sticks, or coffee stir sticks, to form a straight edge. These small repairs are quick and easy. If you have any original parts, mount them with the duct tape, then build with epoxy and fiberglass cloth. |