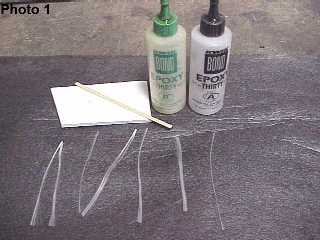
 Photo 1:
Use slow set epoxy, available at model supply or hobby
shops. You'll also need some strands of fiberglass. I
prefer getting a piece of 24 oz. cloth, and taking it
apart. Cut the strands as shown. Use small wooden sticks
to stir the epoxy, and for placing and coating the
strands.
|
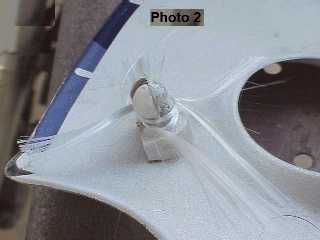 Photo 2:
Tie the strands around the neck of the broken pin. Use
two strips, fanning the ends out onto the plastic. Tie
all of the pieces you want, for the neck, before applying
any epoxy. It is very hard to tie knots in wetted
strands.
|
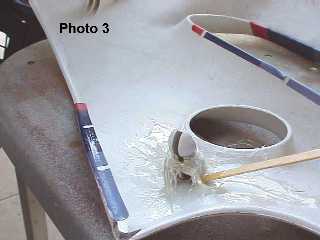 Photo 3:
Work epoxy glue under the broken pin, and into the
strands. Take your time, and get the strands fully
wetted. You have about 15-20 minutes working time with
this epoxy.
|
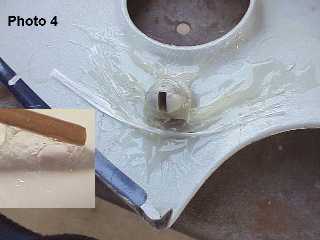 Photo 4:
You may let the epoxy set until it is partially gelled,
as shown in the inset photo. As long as the epoxy is
still tacky, new epoxy will cross-link, forming a strong
bond. Now add more strands, over the tied-on strips, to
increase the bond surface. Note the fanned out, fully
wetted ends of the first layer.
|
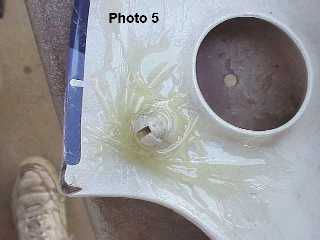 Photo 5:
Here's the finished pin, fully glued, wrapped with
fiberglass, and VERY strong (much stronger than the
original part).
|
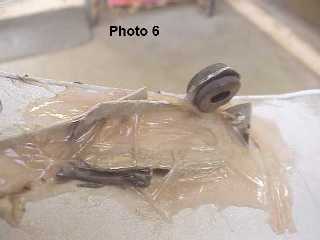 Photo 6:
I broke one of my lower fairing mounts off, and lost it
in the crash (deep sand is bad that way!) I fabricated a
new eye, out of thin aluminum and a rubber grommet. With
holes drilled in the remaining bits of plastic (and the
aluminum), fiberglass strands were laced through the
holes. Apply epoxy and more strands, as shown previously,
and you'll have a very good repair. HINT: For position
critical repairs, hot glue the part in place, then tie,
wrap, lace with fiberglass strands and epoxy. The hot
glue remains buried in the epoxy. I've also repair
cracked panels by running lengthwise strands of
fiberglass at the edge, before applying glass cloth.
Build the edge thicker than the general repair.
|